
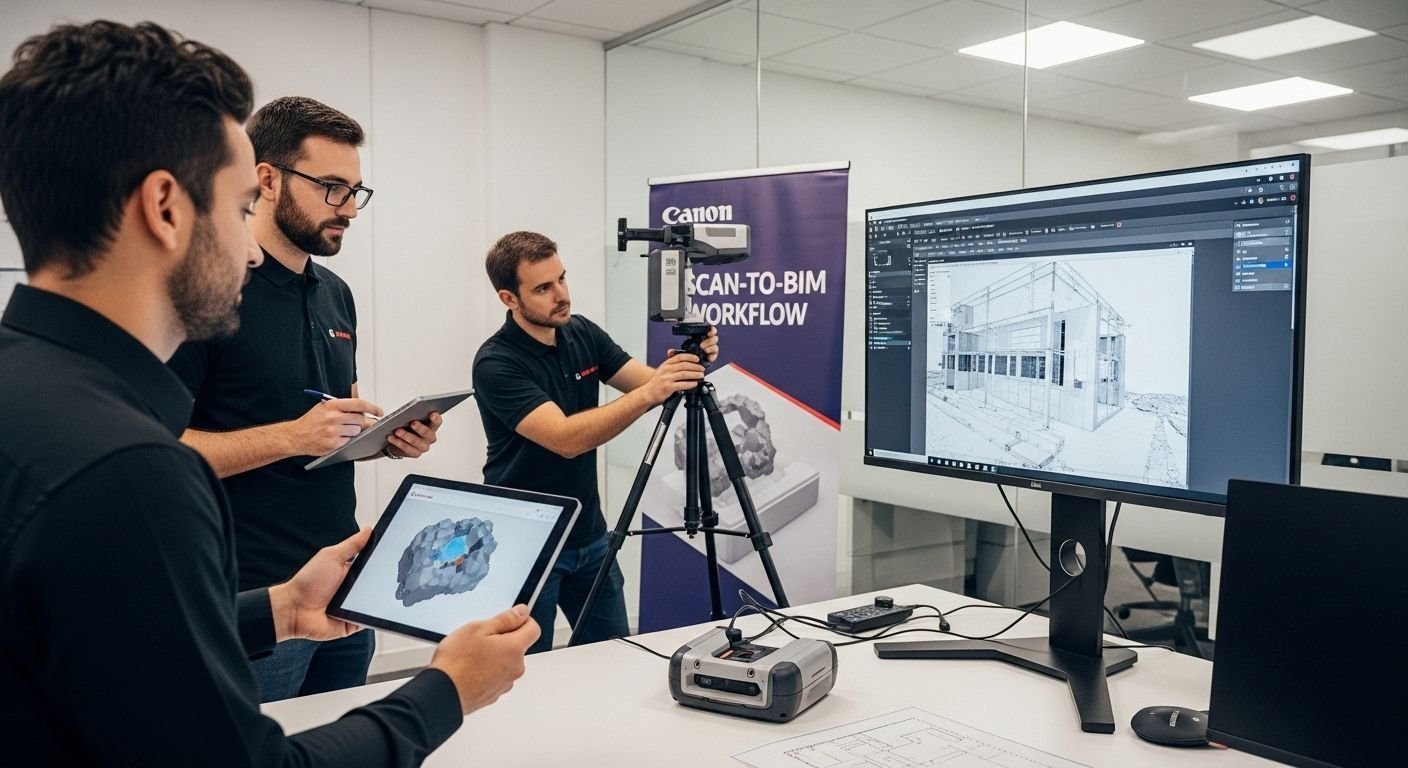
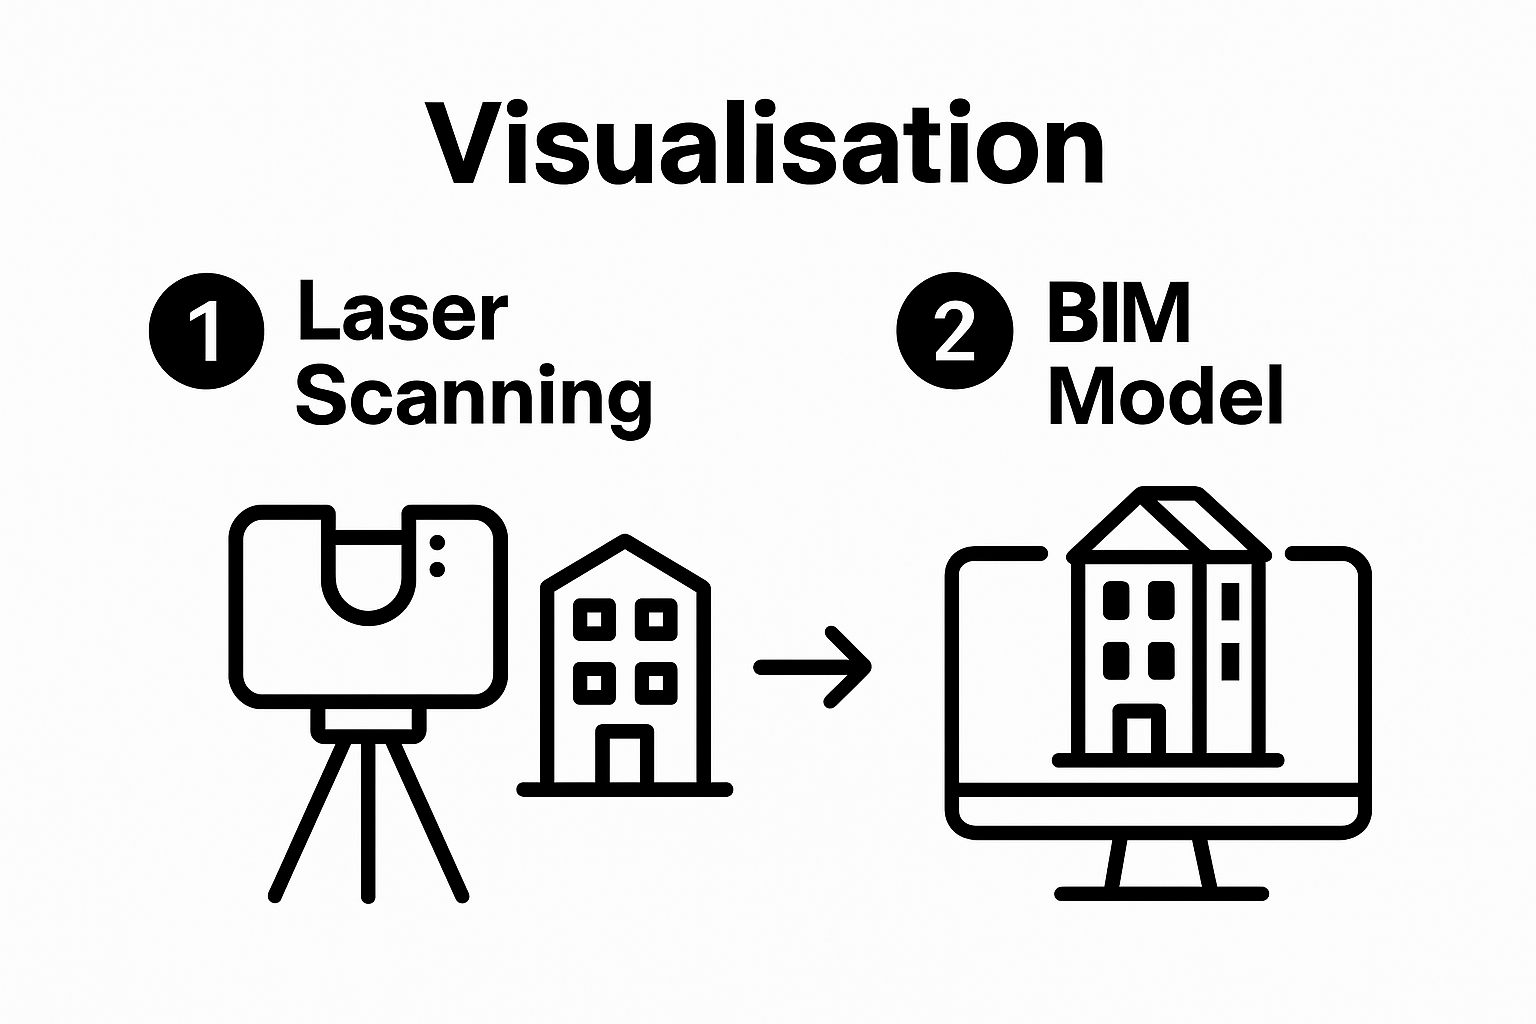
Scan-to-BIM has become a gamechanger in architectural documentation, letting teams transform real-world spaces into digital models with jaw-dropping accuracy. Yet, what most people miss is that the magic lies far beyond the scanning device itself. Projects with well-defined goals and parameters see far fewer inefficiencies and up to 50 percent reduction in rework costs, thanks not to the tech, but to meticulous project requirement planning before scanning begins.
Table of Contents
- Step 1: Identify Project Requirements And Goals
- Step 2: Select Appropriate Scanning Equipment
- Step 3: Conduct Accurate 3D Laser Scanning
- Step 4: Process And Convert Scans Into BIM Models
- Step 5: Validate The BIM Model Against Original Scan Data
- Step 6: Implement The BIM Model In Project Planning
Quick Summary
| Key Point | Explanation |
|---|---|
| 1. Define Clear Project Goals | Start by establishing precise goals and parameters to guide the scan-to-BIM process effectively. |
| 2. Choose Suitable Scanning Equipment | Select equipment based on project needs, accuracy requirements, and budget considerations to ensure successful data capture. |
| 3. Ensure Rigorous Site Preparation | Clean and assess the scanning area to minimise obstructions, ensuring high-quality point cloud data collection. |
| 4. Validate BIM Models Against Scans | Conduct thorough comparisons between the generated BIM model and original scan data to ensure accuracy and reliability. |
| 5. Integrate BIM Models into Project Planning | Utilize the BIM model for informed decision-making and interdisciplinary collaboration throughout the project lifecycle. |
Step 1: Identify Project Requirements and Goals
Successful scan-to-BIM workflow begins with meticulous project requirement identification—a foundational step that determines the entire project’s trajectory. By establishing precise goals and parameters upfront, you create a strategic roadmap that guides subsequent laser scanning and modelling efforts.
Initiate your project by conducting a comprehensive requirements gathering session with all key stakeholders. This collaborative process involves architects, engineers, contractors, and clients to establish a unified understanding of project objectives. Critical parameters to define include desired level of detail, specific architectural or structural elements requiring documentation, and intended final model usage.
Carefully evaluate the existing physical asset’s complexity and condition. Some projects might require millimetre-level precision for heritage restoration, while others need broader dimensional documentation for renovation planning. Understanding these nuanced requirements helps select appropriate scanning technologies and define the required level of model development (LOD).
Assess technical specifications that will influence your scan-to-BIM workflow. Key considerations include:
- Scanning resolution needed
- Acceptable geometric accuracy tolerances
- Required coordinate system references
- Specific software compatibility requirements
- Interdisciplinary model integration expectations
Document these specifications meticulously, creating a comprehensive brief that serves as your project’s technical blueprint. According to research from the Journal of Information Technology in Construction, clearly defining information requirements before initiating scanning activities prevents potential inefficiencies and ensures stakeholder alignment.
Verify your project requirements by cross-referencing them against initial site survey findings. This validation step confirms that your predefined goals remain realistic and achievable given the actual site conditions. A thorough review helps anticipate potential challenges and adjust your approach proactively, setting the stage for precise and successful scan-to-BIM implementation.
Step 2: Select Appropriate Scanning Equipment
Selecting the right scanning equipment represents a pivotal moment in your scan-to-BIM workflow, directly impacting the precision and quality of your final digital model. This critical decision requires a strategic approach that balances technical capabilities, project requirements, and budgetary considerations.
Laser scanning technology offers multiple equipment options, each with unique strengths and limitations. Terrestrial laser scanners provide exceptional detail for stationary environments, while mobile scanning systems enable dynamic data collection across larger areas. Photogrammetric solutions offer cost-effective alternatives for projects with less stringent accuracy demands.
Evaluate your scanning equipment based on several fundamental performance metrics. Key considerations include scanning range, point cloud density, accuracy specifications, and compatibility with your preferred BIM software. Higher-end scanners might capture millions of points per second, delivering unprecedented geometric precision, but also command significantly higher investment.
The following table provides a comparison of the main types of scanning equipment discussed in the article, outlining their characteristics and ideal project uses to aid in selection.
| Scanning Equipment Type | Key Characteristics | Ideal Use Cases |
|---|---|---|
| Terrestrial Laser Scanners | High detail, stationary, high accuracy | Detailed stationary environments |
| Mobile Scanning Systems | Dynamic data collection, covers large areas, moderate accuracy | Large sites, where speed is required |
| Photogrammetric Solutions | Cost-effective, uses photographs, lower accuracy | Projects with less stringent accuracy needs |
Consider practical operational factors beyond pure technical specifications. Weight, portability, battery life, and ease of setup dramatically influence field performance. Robust equipment that withstands challenging environmental conditions becomes crucial for complex architectural documentation projects.
According to research from the National Institutes of Health, device accuracy, scanning speed, and software interoperability are fundamental determinants of successful scan-to-BIM outcomes. Your equipment selection should align with these critical parameters.
Verification checklist for equipment selection includes:
- Confirmed accuracy tolerances matching project requirements
- Compatibility with existing project software ecosystem
- Adequate scanning range for project scope
- Robust data processing capabilities
- Reliable manufacturer support and calibration services
Professional tip: Consider renting high-end equipment for specialized projects rather than purchasing, which allows access to cutting-edge technology without substantial capital investment. This strategy provides flexibility while maintaining high-precision scanning capabilities.
Final equipment validation involves conducting preliminary test scans, comparing results against project accuracy benchmarks, and ensuring seamless data translation into your BIM environment. A methodical selection process transforms scanning equipment from a mere tool into a precision instrument driving your digital documentation success.
Step 3: Conduct Accurate 3D Laser Scanning
Precision in 3D laser scanning transforms raw physical spaces into digital documentation with extraordinary detail. This critical stage demands methodical preparation, strategic scanning techniques, and meticulous execution to capture comprehensive architectural information.
Site preparation represents the foundation of successful scanning. Before initiating data collection, thoroughly clean and clear the scanning area, removing temporary obstructions that might interfere with point cloud data capture. Assess lighting conditions, potential reflective surfaces, and environmental factors that could compromise scanning accuracy.
Establish a robust network of control points and reference targets strategically positioned throughout the scanning environment. These markers enable precise registration and alignment of multiple scan positions, ensuring seamless point cloud integration. Professional surveyors recommend placing targets with overlapping visibility, creating multiple connection points that enhance overall geometric accuracy.
During the scanning process, adopt a systematic approach that minimises potential data gaps. Plan your scanning positions to ensure comprehensive site coverage, typically involving multiple strategic setups that provide complete visual access to architectural elements. Overlap between scan positions should range between 30-50 percent, creating redundant data capture that facilitates more reliable point cloud registration.
Monitor equipment performance continuously throughout the scanning session. Temperature fluctuations, vibrations, and equipment positioning can subtly impact data collection precision. Regularly verify scanner calibration, validate target visibility, and confirm consistent scanning parameters to maintain high-quality data acquisition.
Consider the following critical scanning workflow considerations:
- Maintain consistent scanner height and orientation
- Scan at appropriate resolution for project requirements
- Capture additional detailed scans of complex architectural features
- Document environmental conditions affecting scanning
- Verify real-time data quality during acquisition
Accurate scanning demands patience and methodical execution. Rushing through data collection introduces potential errors that cascade through subsequent workflow stages. Professional scanning technicians often recommend multiple scanning passes, comparing results to identify and rectify potential inconsistencies.
Verification involves immediate on-site data quality assessment. Review point cloud density, check for potential occlusions, and confirm comprehensive site coverage before concluding the scanning session.
Below is a checklist table summarising key verification steps for ensuring 3D laser scanning quality, as outlined in the article. Use this as a field guide to maintain rigorous standards throughout the scanning process.
| Verification Step | Purpose | When to Perform |
|---|---|---|
| Clean and clear the scanning area | Eliminate obstructions for quality point cloud data | Before scanning begins |
| Set up control points and reference targets | Facilitate accurate scan alignment and registration | Prior to data collection |
| Check equipment calibration | Ensure consistent and precise measurements | Regularly during scanning |
| Monitor environmental conditions | Identify factors that may affect scan accuracy | Throughout scanning process |
| Review point cloud density and coverage | Confirm complete and detailed data has been captured | Immediately after scanning |
| Verify overlap between scan positions | Reduce data gaps and improve registration reliability | During each scan setup |
| This proactive approach prevents costly rescan scenarios and ensures a solid foundation for your subsequent BIM modeling efforts. |
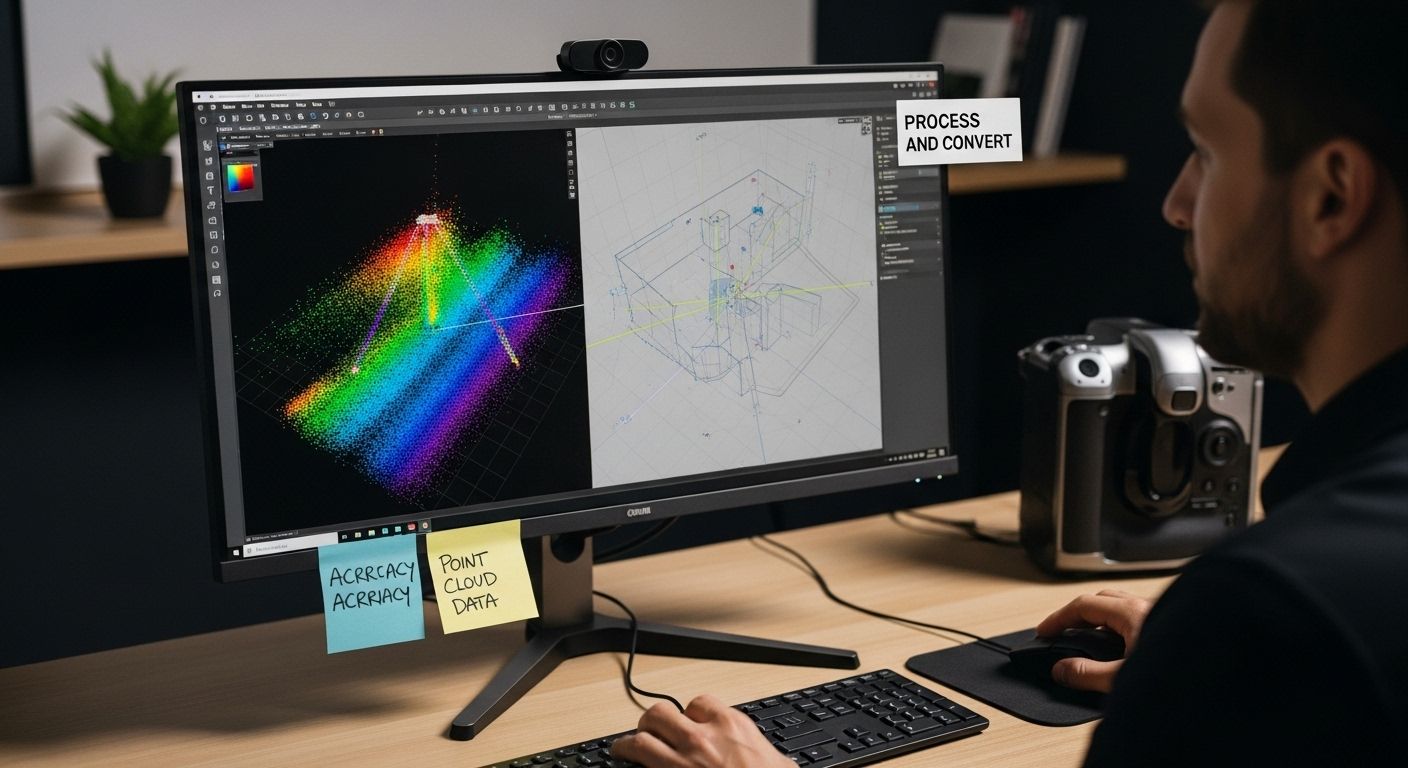
Step 4: Process and Convert Scans into BIM Models
Transforming raw point cloud data into precise BIM models represents the most intricate stage of the scan-to-BIM workflow. This complex process demands technical expertise, sophisticated software, and a methodical approach to converting millions of spatial points into intelligent, structured digital representations.
Point cloud registration emerges as the initial critical transformation step. Begin by aligning multiple scan positions using strategically placed reference targets, ensuring comprehensive spatial coherence. Professional software platforms like Autodesk ReCap or Faro Scene enable automated and manual alignment techniques, allowing precise point cloud consolidation into a unified coordinate system.
Once registered, point cloud data undergoes rigorous cleaning and noise reduction. Eliminate spurious data points, remove environmental artifacts, and smooth scanning inconsistencies that might compromise model accuracy. Advanced filtering algorithms help isolate architectural elements while maintaining geometric integrity, preparing the dataset for intelligent model generation.
Transition from point cloud to parametric BIM model requires specialized modelling techniques. Trace foundational geometric elements systematically, converting point cloud information into intelligent building components like walls, floors, windows, and structural elements. Each model element must accurately represent both geometric dimensions and material properties, transforming raw scan data into a semantically rich digital asset.
Pay exceptional attention to model complexity and level of detail. Different project requirements demand varying levels of model development (LOD), ranging from basic geometric representation to highly detailed architectural models incorporating intricate material characteristics and precise dimensional tolerances.
Consider these critical model conversion strategies:
- Prioritize geometric accuracy over unnecessary complexity
- Maintain consistent coordinate system references
- Use parametric modelling tools for intelligent component creation
- Validate dimensional accuracy against original point cloud data
- Document modeling assumptions and potential limitations
According to research exploring scan-to-BIM methodologies, successful model conversion depends on aligning the BIM reconstruction process with specific project information requirements. This approach ensures that your digital model serves its intended purpose effectively.
Verification involves comprehensive model validation. Compare the generated BIM model against original point cloud data, checking dimensional accuracy, geometric fidelity, and semantic completeness. Implement a systematic review process that cross-references architectural elements, ensuring your digital model represents the physical environment with ultimate precision.
Step 5: Validate the BIM Model Against Original Scan Data
Validation represents the critical quality assurance phase in the scan-to-BIM workflow, transforming your digital model from a mere representation to a precise, reliable architectural documentation instrument. This meticulous process ensures that your BIM model accurately captures the physical environment’s intricate geometric and semantic characteristics.
Dimensional deviation analysis forms the cornerstone of comprehensive model validation. Employ sophisticated comparison tools that enable pixel-by-pixel and point cloud-to-surface comparisons, identifying and quantifying geometric discrepancies between the original scan data and the generated BIM model. Professional software platforms provide color-coded deviation maps, visually highlighting areas of potential inaccuracy with millimetre-level precision.
Establish rigorous validation criteria before initiating the comparison process. Define acceptable tolerance ranges specific to your project’s requirements, considering factors such as architectural complexity, intended model usage, and required level of detail. Systematic deviation thresholds might range from 5mm for high-precision heritage restoration projects to 20mm for broader architectural documentation.
Conduct a comprehensive multi-dimensional validation approach. Beyond geometric accuracy, assess semantic integrity by verifying that model components correctly represent architectural elements. Validate that walls, floors, openings, and structural elements maintain not just dimensional accuracy but also appropriate material properties and construction logic.
Consider these critical validation strategies:
-
Perform multiple comparison iterations
-
Use statistical deviation analysis
-
Validate both macro and micro-scale geometric representations
-
Document and categorize identified discrepancies
-
Establish clear remediation protocols for detected errors
According to research exploring BIM validation methodologies, effective model validation requires a standardized geometric quality assessment approach that combines quantitative measurement with contextual understanding.
Verification involves generating comprehensive validation reports that transparently communicate model accuracy. These reports should include deviation heat maps, statistical analysis of geometric variations, and recommended corrections. A successful validation process transforms your BIM model from a raw digital representation into a precise, trustworthy architectural documentation tool, ready for further design, analysis, or documentation purposes.
Step 6: Implement the BIM Model in Project Planning
Implementing the BIM model into project planning transforms your meticulously captured digital representation from a passive documentation tool into an active project management asset. This crucial stage bridges the gap between precise architectural documentation and strategic project execution, enabling comprehensive decision-making across multiple project dimensions.
Interdisciplinary model integration becomes the primary focus during this implementation phase. Collaborate closely with architects, engineers, contractors, and stakeholders to distribute the BIM model across various project planning platforms. Ensure compatibility with project management software, enabling seamless data exchange and real-time collaborative insights.
Utilise the BIM model as a comprehensive decision-making instrument. Leverage its geometric precision and semantic richness to simulate construction sequences, analyse potential design modifications, and identify potential spatial conflicts. Advanced BIM platforms allow dynamic scenario testing, helping project teams anticipate challenges and optimise resource allocation before physical construction commences.
Develop a structured approach to model information distribution. Create specific model views tailored to different stakeholder requirements, ensuring each team receives relevant information without overwhelming them with unnecessary details. Structural engineers might require detailed material specifications, while project managers might prioritise scheduling and spatial coordination insights.
Consider these critical implementation strategies:
- Establish clear model sharing protocols
- Define access permissions for different stakeholder groups
- Create standardised model view configurations
- Implement version control mechanisms
- Schedule regular model coordination meetings
According to research exploring Scan-to-BIM implementation methodologies, successful model integration involves a systematic approach that transforms digital documentation into actionable project intelligence.
Verification involves tracking model utilisation across project teams. Monitor how different stakeholders interact with the BIM model, gathering feedback on its utility, identifying potential improvement areas, and ensuring that the digital representation genuinely enhances project planning efficiency. A well-implemented BIM model becomes more than a technical artifact—it evolves into a dynamic, collaborative project management tool driving informed decision-making.
Take Your Scan-to-BIM Workflow from Technical Challenge to Professional Advantage
Achieving true precision in scan-to-BIM projects can feel overwhelming when even small data gaps or modelling errors lead to costly rework and coordination headaches. This article highlights the importance of clear project requirements, seamless data validation, and robust BIM implementation as the pillars of successful digital documentation. However, juggling these demands alone puts unnecessary risk on your project’s timeline and outcomes, especially in high-value residential and hospitality developments.
Bring confidence and clarity to every phase by partnering with Reltic BIM. Our team delivers expert scan-to-BIM services tailored to your specific needs—including advanced point cloud processing, dimensional accuracy assurance, and integration with the latest BIM coordination technology. Explore how our solutions empower architects, contractors, investors, and homeowners to avoid common pitfalls and unlock smoother project delivery by visiting our BIM Services page. For a truly bespoke digital documentation experience, contact us directly through Reltic BIM. Precision starts with the right partner—take the next step towards digital excellence on your next project today.
Frequently Asked Questions
What is the first step in the scan-to-BIM workflow?
The first step involves identifying project requirements and goals. This includes conducting a comprehensive requirements gathering session with all key stakeholders to establish project objectives, desired levels of detail, and the intended final model usage.
How do I choose the right scanning equipment for my project?
Selecting the appropriate scanning equipment requires evaluating factors such as scanning range, point cloud density, accuracy specifications, and compatibility with your BIM software. Consider practical operational factors like ease of setup, weight, and battery life as well.
What should I do to ensure the accuracy of 3D laser scanning?
To ensure accuracy, conduct thorough site preparation by cleaning the area and assessing environmental conditions. Establishing control points and reference targets is vital, as well as adopting a systematic scanning approach with 30-50% overlap between scanning positions to minimise data gaps.
How can I validate that my BIM model accurately reflects the original scan data?
Validation involves performing dimensional deviation analysis using professional software that compares point cloud data with the BIM model. Establish clear acceptance criteria and document any discrepancies, ensuring rigorous quality assurance throughout the process.